We are pleased to announce that we are now able to resume manufacturing the NHBS Harp Trap! We have had the time to be able to think about the design of the trap and tweak it to make it easier to use. At first glance, this compactly packed harp trap may look as though it would be tricky to set up, but rest assured that, with the use of two people, you’ll be able to easily assemble this trap, even in the dark. This blog provides a step-by-step guide to how to set up and disassemble the trap. If you are interested in finding out more general information about the NHBS Harp Trap, the only harp trap that is commercially produced in Europe, and its use, please check out the blog we wrote when we first launched the trap.
Please note that the NHBS Harp Trap is a made-to-order item so please contact us if you would like to purchase one and we will be happy to advise the current lead time.
The NHBS Harp Trap: Instructions
Please follow these instructions for correct assembly and disassembly. We recommend that this is carried out by two people.
Assembly
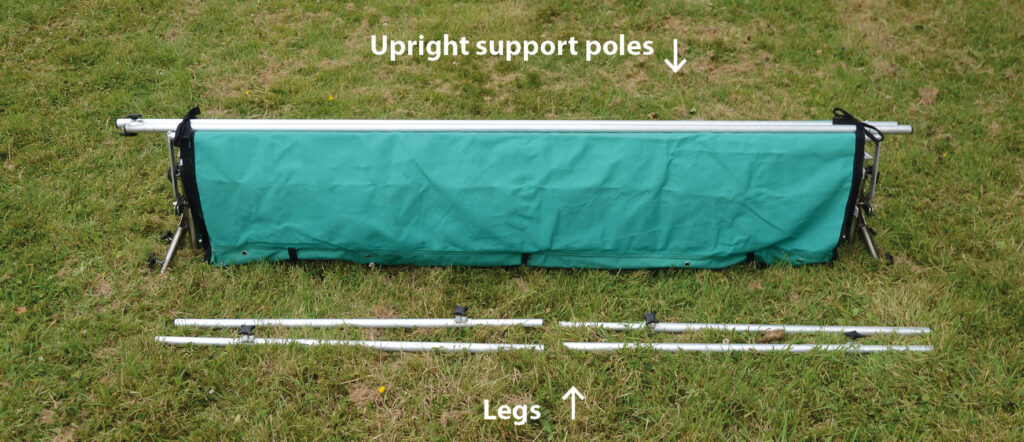
1. Carefully remove the harp trap from its carry bag and sit it upright on the floor still wrapped up. Remove the legs and upright support poles from on top of the trap.
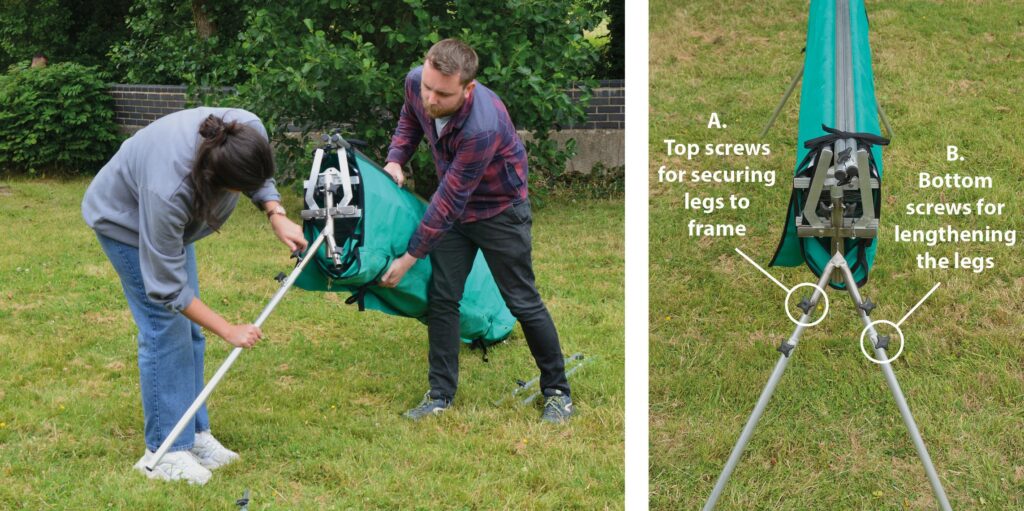
2. Insert the legs at either end of the frame (it is easiest to do this one end at a time). Hand tighten the top thumb screws (A). The lower thumb screws (b) are for extending the legs to make the trap higher or balanced if on uneven ground; the leg lengths can be adjusted as needed after the trap is assembled.
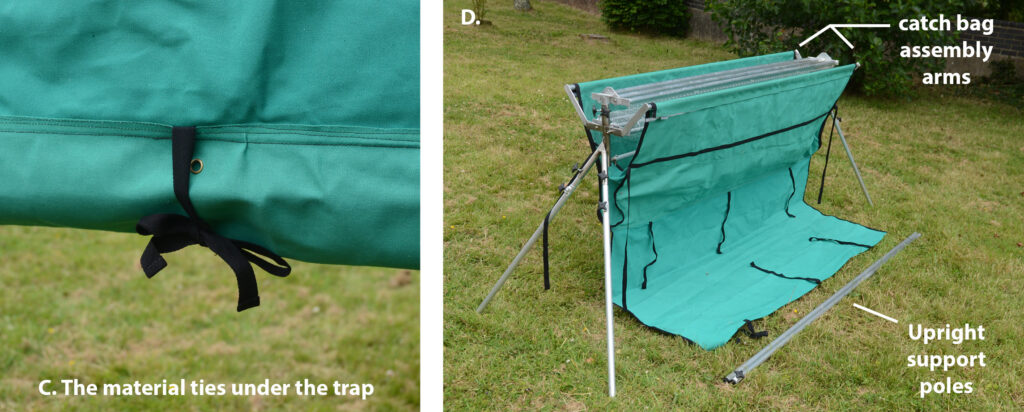
3. Undo the material ties at the bottom of the trap (C) to unroll the green catch bag flap so that it is laid out on the floor (D).
4. Fully open out the catch bag assembly arms to their full width (D).
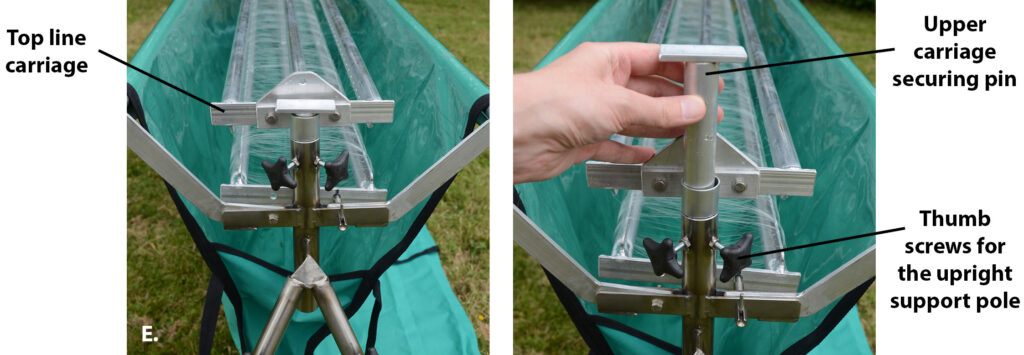
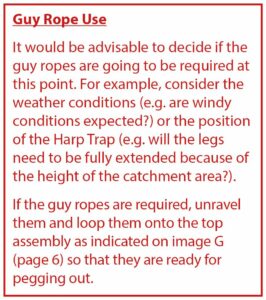
5. Remove the upper carriage securing pin by loosening the upright support pole thumb screws (E). Where the upper carriage securing pins have been removed, insert upright support poles and allow them to rest on the ground. Ensure that the fixing points (thumb screws) on the upright support poles are facing each other.
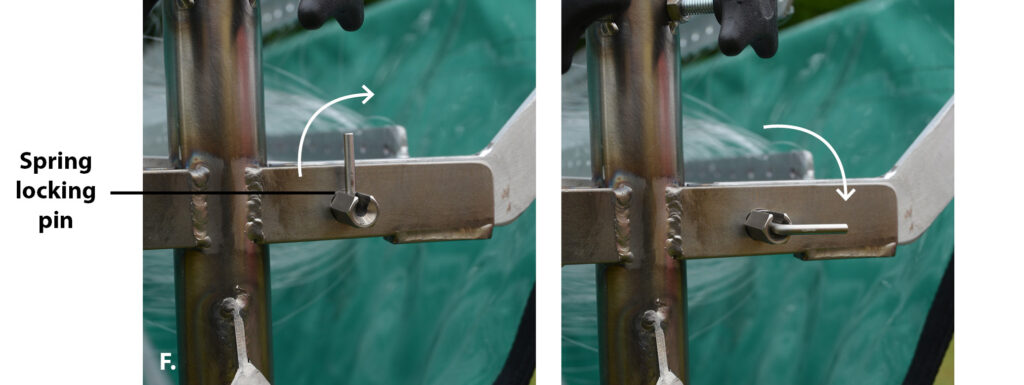
6. Release the spring locking pins from both ends of the trap by pulling the leaver out and rotate it 90° to lock in open position (F).
7. Remove the thumb screw from the top of each upright support pole and slowly raise the top line carriage, keeping both ends level and watching closely to ensure that the lines do not become jammed. Once the carriage reaches the fixing point secure with upright support pole thumb screws.
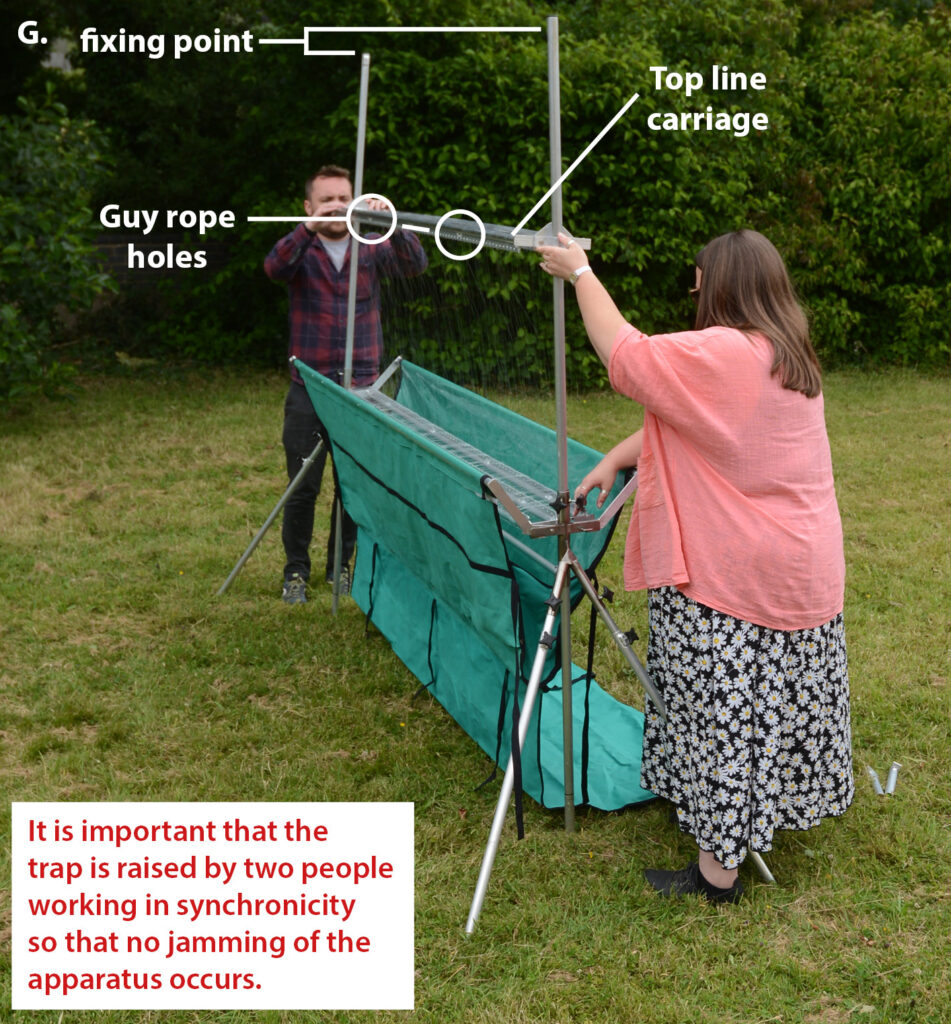
8. Once you are confident that the top carriage is secure, slowly lift the upright support poles in unison again, and carefully watch the lines to ensure that none get caught. Keep raising until the lines become taut. Engage both spring locking pins in the bottom carrier (reverse of F), check the tension is even at both ends of the trap and when happy tighten the two thumb screws at the base of the upright support poles evenly at both ends to secure.
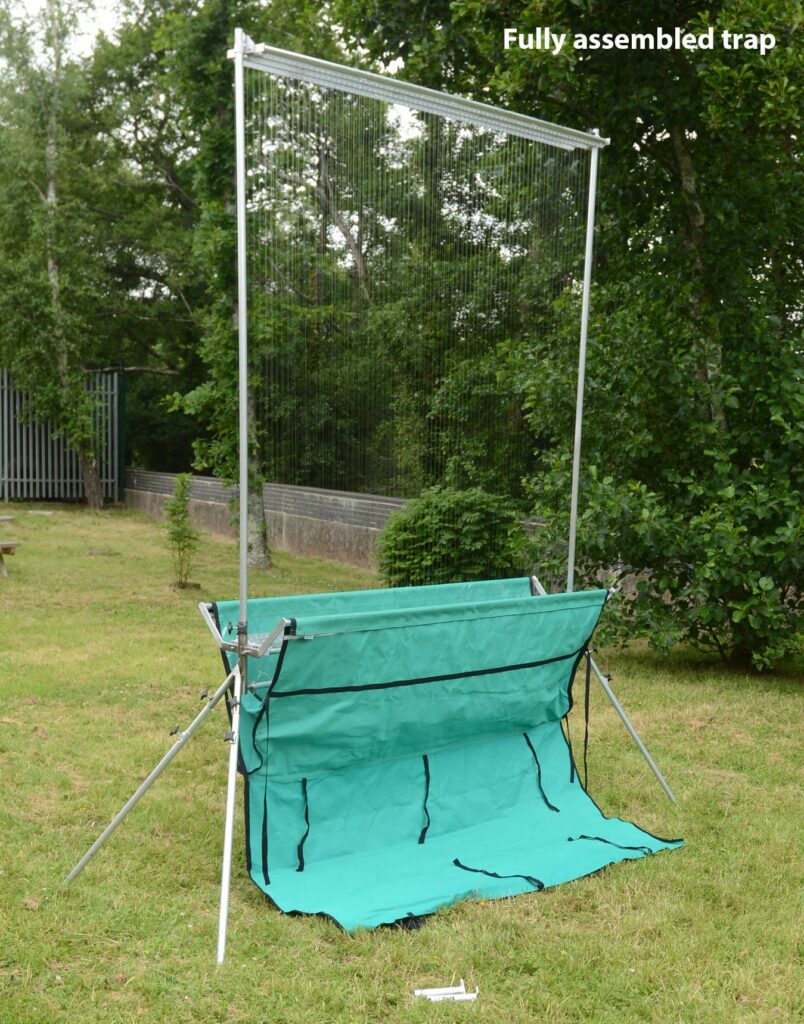
9. If required, peg out the guy ropes for extra stability.
Disassembly
1. If guy ropes have been used pull out the red pegs and store them carefully. Now wind up the guy ropes.
2. While holding on to the upright support poles (one person at each end), loosen the thumb screws at the base of the upright support poles, holding them in position and allow them to lower slightly. Disengage the spring locking pins on each end (as in F) and start to wind the lower line carrier. Keep lowering the upright support poles slowly and evenly while winding the line carrier until the upright support poles reach the floor.
Care must be taken to not allow the line to come free off the end of the line carrier as this may result in snagging of the lines and subsequent breakage – guiding the lines with your hand/arm while lowering is essential (H).
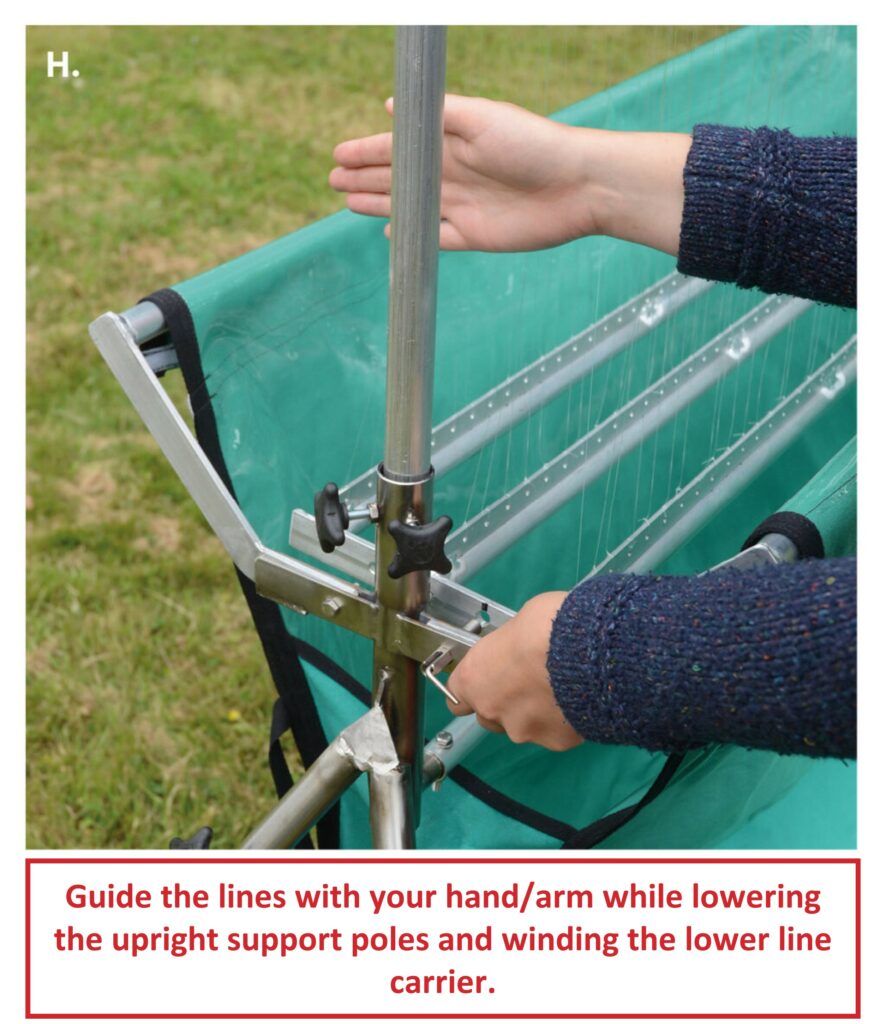
3. With the upright support poles resting on the ground, remove the top carriage securing thumb screws and allow the line carrier to lower, guiding the line with your hand/arm and winding as you go (H). Return the top line carrier thumb screws back to the storage points in the upright support poles.
4. Once the top carriage has been fully lowered, engage the spring locking pins, remove the upright support poles, and secure the top carriage back into storage position using the upper carriage securing pin and tighten the thumb screws to secure in place (reverse of E).
5. Fold the arms of the catch bag assembly inwards as far as they will go, wrap the bag around the trap and tie the bottom attached material straps to secure in place.
6. Undo the top thumb screws that are securing the legs and remove each leg. For safekeeping, ensure that the thumb screws are tightened once the legs have been removed.
7. Fully collapse each leg to its minimum length and tighten with thumb screws.
8. Place the upright support poles and legs back on top of the closed trap and secure them in place using the attached material ties at either end. Carefully place the trap and accessories bag back in the carry bag safely ready for next time.
Spares and accessories included:
4x Guy rope 5m
4x Red pegs
1x Roll of nylon string
1x Accessories bag
The NHBS Harp Trap is available on the NHBS website. The trap is available as a three-bank trap as standard, but please contact our Workshop Team to discuss your requirements if you would like a bespoke two or four-bank trap, or if you would like a trap that has the ability to be suspended from a support.
To view the full range of NHBS manufactured items, along with other ranges of survey equipment, visit www.nhbs.com. If you have any questions on the NHBS Harp Trap or would like some advice on the best survey equipment for you then please contact us via email at customer.services@nhbs.com or phone on 01803 865913.


